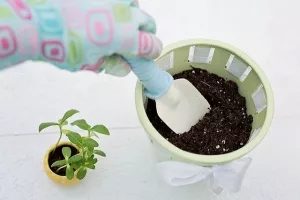
Indoor plants do more than decorate a room. They filter the air, add texture, and make a space feel alive. But that benefit only lasts as long as the plant is healthy. Eventually, the pot you bought years ago becomes a prison. The roots get tangled, the soil dries out or stays waterlogged, and growth stalls. You know something is wrong. The fix is simple: move the plant to a bigger home.
Repoting seems easy. Pull it out, drop it in a bigger pot, done. Do it wrong, and you shock the plant. Do it right, and you unlock a new phase of growth. Here is how to do it without killing your green companion.
How to know if your houseplant needs a new pot
You cannot always tell by looking at the leaves. A droopy plant might just be thirsty. You need to check the roots.
Look at the soil surface first. Are roots pushing up? Is the whole root ball lifting out of the top of the pot? If yes, the plant is root-bound.
But there is a better way to be sure. Gently lift the plant out of its saucer or outer pot. Look at the drainage hole at the bottom.
If roots are poking out there, you might need to repot. But that is not a guarantee. Sometimes roots just wander. The real test is removing the plant from the pot entirely.
Hold the soil block and look at the roots.
“If you see many young root tips pressing against the pot edge, or thick spirals formed at the bottom, it is time for a larger pot.”
That is the signal. The roots have hit the wall. They cannot spread. The plant is stuck.
Which pot size should you choose for repotting?
Do not go giant. Do not go small. The rule is simple: the new pot should be about three centimeters wider in diameter than the current one.
That is it. Three centimeters.
Why not more? A pot that is too big holds too much soil. That soil stays wet too long. Roots rot. The plant damps off. It dies.
Why not less? No sense. You are repotting to give space.
Measure your current pot with a tape measure. Note the diameter. Add three centimeters. That is your target.
When shopping, look for the diameter listed on the product page. Sites like Blumentopf24 list these details. Use them. Do not guess. A 14 cm pot goes into a 17 cm pot. Not a 25 cm pot.
You will also need fresh potting soil. The old soil is broken down. It has lost structure. It has lost nutrients. It harbors pests. Throw it away. Buy a high-quality indoor plant mix. One that drains well but holds some moisture.
You now have the right pot. You have the right soil. The plant is waiting.

The soil mix matters more than you think
Skipping out on quality substrate is a mistake you will pay for later. The plant will live in that dirt for the next year or two. You want a loose structure. No hard clumps. If you squeeze a handful, you should feel a mix of fine particles and coarser bits. That texture holds nutrients while still breathing. Cheap soil compacts. It suffocates roots. Premium potting mix costs more upfront but saves you the headache of a dying houseplant.
Prep the new pot before you touch the plant
Grab the new container. Do not just throw the plant in. There is a setup process. Cover the drainage hole at the bottom with a shard of terracotta. This keeps the fresh earth from washing out. It also helps excess water flow down and away. Add a thin layer of gravel on top of that shard. This boosts drainage. Then sprinkle a layer of soil over the gravel.
Tap the side of the pot gently. This knocks out air pockets. It settles the gaps. If you are using a clay or terracotta pot, soak it in water first. Dry clay acts like a sponge. It steals moisture from your plant’s roots before the roots even get a chance. A wet pot protects the hydration balance.
Getting the plant out without breaking the roots
Hold the old pot at a slight angle. Tap the sides gently. The plant should slide out easily. If it is stuck tight, do not yank it. Yanking rips roots. It tears the ball apart. If the plant refuses to budge, destroy the pot. This sounds drastic but it is safer for the plant. A hammer works fine for terracotta. For plastic pots, use heavy-duty garden shears to cut the walls.
Once the plant is out, shake it gently. Loose dirt will fall off. Do not pull at the roots to clear the soil. If the dirt is caked on tight, dunk the root ball in water for a few seconds. The moisture loosens the compacted soil. It makes it easier to separate without damage.
Repotting and filling the gaps
Place the plant in the new pot. Check the height. The soil level should be about two centimeters below the rim. This is your watering margin. It stops water from overflowing when you water. Fill the empty spaces around the root ball with fresh soil. Press it down gently. You want it snug but not compressed. Tap the rim of the pot again. This settles the soil evenly. It ensures no air pockets remain under the root ball. The plant is now settled.
How to set the soil and prepare for watering
Once the plant is sitting upright in its new home, the soil needs to settle. You can achieve this by gently tapping the bottom of the pot against a table or the floor. This action compacts the earth around the roots, eliminating air pockets that could dry out the root ball later.
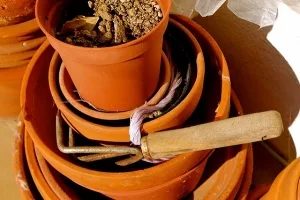
Do not throw away the old container. Keeping it is a practical move for several reasons. It remains useful for future repotting projects or for starting new seedlings. Recycling your own pots saves money and reduces waste.
Watering and the role of the decorative pot
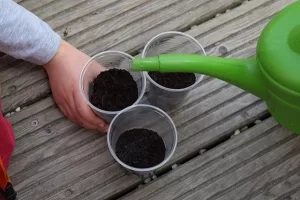
Now comes the hydration part. Use lukewarm water. Pour it gently over the soil until it drains through the holes at the bottom. Let the excess water collect in the saucer or tray. Once the pot has stopped draining, lift it and empty that standing water.
Leaving the plant sitting in a pool of water is a common mistake. It can lead to root rot. After draining, place the potted plant into a larger decorative pot, often called a cachepot. This adds a visual layer to your setup while keeping the drainage system intact. The plant sits safely inside, looking presentable without the risk of waterlogging.
Keeping your repotted houseplant happy
Give the plant a bright spot that stays cool. It needs time to settle into the new environment. Too much heat right after the move stresses the roots. Light without direct sun exposure works best for the next few weeks.
Making the pot look good
A functional pot is fine, but it can look better. An outer pot or cachepot hides the plastic nursery container. This upgrade adds design value to the room. Blumentopf24.de sells illuminated outer pots. These light up the space. They create a specific ambiance that a standard terracotta pot cannot achieve.
Why repotting is easier than you think
Repotting a houseplant is not complicated. It is significantly simpler than growing plants from seed. The process is straightforward.
Do it outside. Or use a tray underneath the table. You do not want soil on your floor. Keep the workspace clean. A video demonstration breaks down the detailed steps. The physical effort is minimal. The main task is handling the roots gently.